Setup
In this guide, we will go through the process of setting up jfa on your local computer, so that you can make changes to the underlying code. This page will show you the initial setup, including how to fork the jfa repository and create a local clone of this repository.
- 1. Forking the
jfarepository - 2. Keeping your fork synced via GitHub Desktop (recommended)
- 2. Keeping your fork synced via the Command line
- 3. Next steps
A fork is a copy of a repository. Forking a repository allows you to freely experiment with changes without affecting the original project. In order to make changes to jfa codebase, you must fork the jfa repository. First, navigate to the koenderks/jfa repository on GitHub. Next, in the top-right corner of the page, click Fork and select your profile.

You might fork a project to propose changes to the upstream, or original, repository. In this case, it's good practice to regularly sync your fork with the upstream repository. To do this, you can use Git via GitHub Desktop. You must first download GitHub Desktop via their website.
Open GitHub Desktop and log in using your GitHub account. Then, click on the menu in the top left corner. From this menu, select Add --> Clone repository.
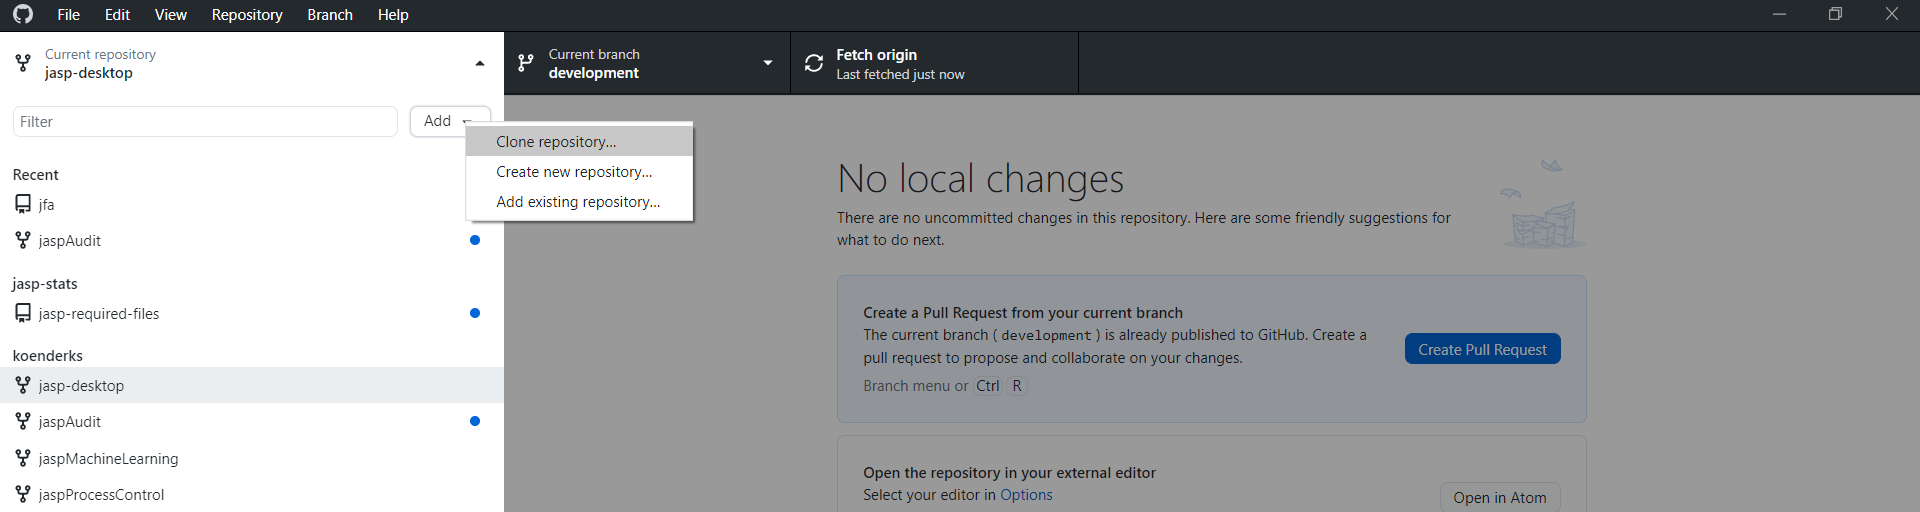
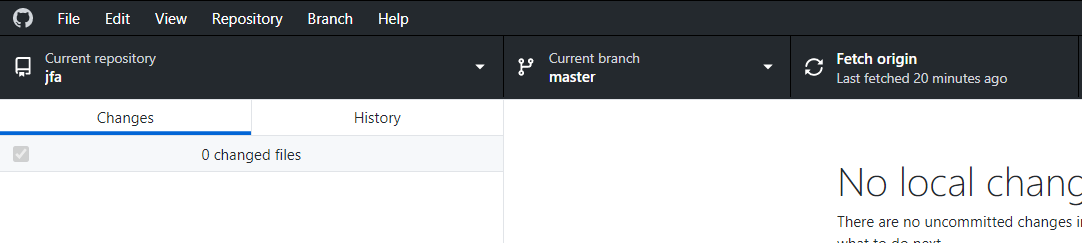
Navigate to the GitHub.com tab. Under your repositories, select the jfa repository. Use the Local path field to clone the repository into a location of your preference. Click Clone to finish. From the next menu, select Contribute to the parent project. You should now see the jfa repository as the current repository in the top left corner.
You might fork a project to propose changes to the upstream, or original, repository. In this case, it's good practice to regularly sync your fork with the upstream repository. To do this, you can use Git on the command line.
If you haven't yet, you should first set up Git. Don't forget to set up authentication to GitHub from Git as well.
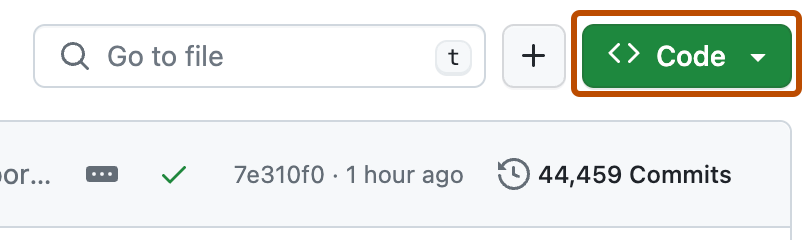
Right now, you have a fork of the jfa repository, but you don't have the files in that repository on your computer. You must now create a clone of your fork locally on your computer. On GitHub, navigate to your fork of the jfa repository. Above the list of files, click Code.
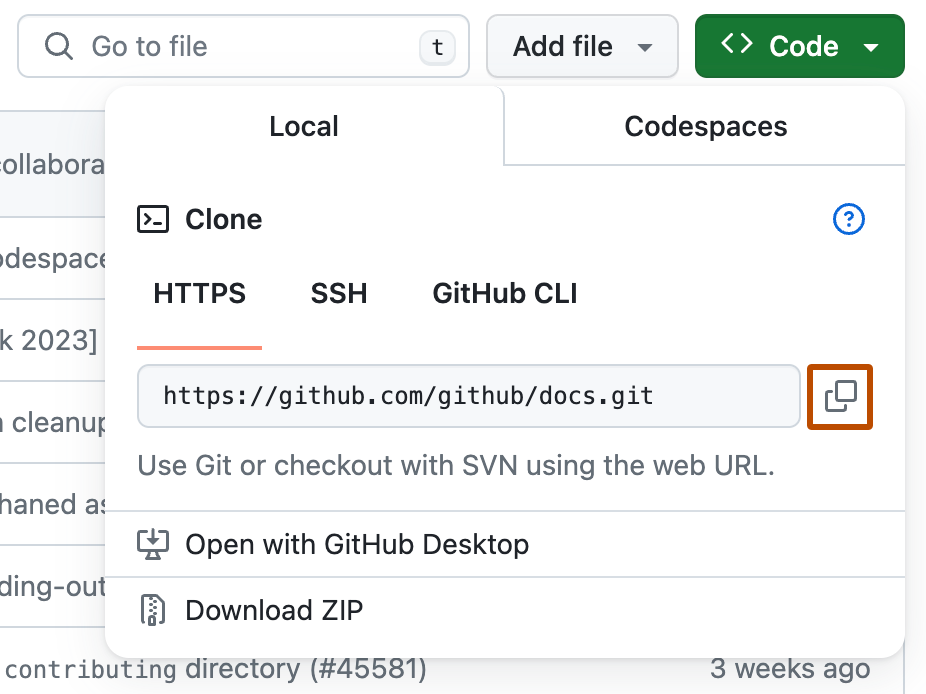
To clone the repository using HTTPS, under "Clone with HTTPS", click the notepad icon. To clone the repository using an SSH key, including a certificate issued by your organization's SSH certificate authority, click Use SSH, then click the notepad icon. To clone a repository using GitHub CLI, click Use GitHub CLI, then click the notepad icon.
Next, open Git Bash. Change the current working directory to the location where you want the cloned directory. Type git clone, and then paste the URL you copied earlier. It will look like this, with your GitHub username instead of YOUR-USERNAME:
$ git clone https://github.com/YOUR-USERNAME/jfa
Press Enter. Your local clone will be created.
$ git clone https://github.com/YOUR-USERNAME/jfa
> Cloning into `jfa`...
> remote: Counting objects: 10, done.
> remote: Compressing objects: 100% (8/8), done.
> remove: Total 10 (delta 1), reused 10 (delta 1)
> Unpacking objects: 100% (10/10), done.
Now you have a local copy of your fork of the jfa repository.
When you fork the jfa project in order to propose changes to the original jfa repository, you can configure Git to pull changes from the original, or upstream, repository into the local clone of your fork. On GitHub, navigate to the koenderks/jfa repository. Above the list of files, click Code.
To clone the repository using HTTPS, under "Clone with HTTPS", click the notepad icon. To clone the repository using an SSH key, including a certificate issued by your organization's SSH certificate authority, click Use SSH, then click the notepad icon. To clone a repository using GitHub CLI, click Use GitHub CLI, then click the notepad icon.
Next, open Git Bash. Change directories to the location of the fork you cloned in Step 2: Create a local clone of your fork. Type git remote -v and press Enter. You'll see the current configured remote repository for your fork.
$ git remote -v
> origin  https://github.com/YOUR_USERNAME/YOUR_FORK.git (fetch)
> origin  https://github.com/YOUR_USERNAME/YOUR_FORK.git (push)
Type git remote add upstream, and then paste the URL you copied in Step 2 and press Enter. It will look like this:
$ git remote add upstream https://github.com/koenderks/jfa.git
To verify the new upstream repository you've specified for your fork, type git remote -v again. You should see the URL for your fork as origin, and the URL for the original repository as upstream.
$ git remote -v
> origin    https://github.com/YOUR_USERNAME/YOUR_FORK.git (fetch)
> origin    https://github.com/YOUR_USERNAME/YOUR_FORK.git (push)
> upstream  https://github.com/koenderks/jfa.git (fetch)
> upstream  https://github.com/koenderks/jfa.git (push)
Now, you can keep your fork synced with the upstream repository with a few Git commands. For more information, see Syncing a fork.
You can make any changes to a fork, including:
- Making changes: You can make changes to the code in the folders that belong to the
jfarepository. - Creating branches: Branches allow you to build new features or test out ideas without putting your main project at risk.
- Opening pull requests: If you are hoping to contribute back to the original
jfarepository, you can send a request to the author to pull your fork into their repository by submitting a pull request.