This Repository is a part of Blockchain based medical health record system, It includes the implementation of Blockchain section only. Full Project with working demo can be viewed at Re-chain
NOTE: this wallet is a publicly shared wallet so do not put any of your personal funds in it. Also, use it only for testing purpose and authorising other accounts to be doctor. To get More testnet Goerli Eth, Use faucets.
Wallet Address: 0x26E0C4e0DeaE504f3ea6996D81F5Bc5357AC8A88
Private Key: d5e0fc4036a051ea77e0f12470cd5783fc00d58a72642206df2520d7fcf33ac5
Process to Authorise a new doctor.
- Login with the above given account in your metamask
- Now, connect with re-chain.
- After this, visit Admin Panel.
- Put a new address here that you want to authorise to become a doctor & confirm the transaction.
- All done, now you can use the account that you have just authorised as a doctor account and check the re-chain.
Records of patients are stored on blockchain which is a decentralised, distributed server. Where no single authority have the power to take down the server. Records are stored all over the internet Using Ethereum Blockchain.
Contracts are the programs that are deployed on the ethereum network and are executed whenever someone makes a call to the contract.
Contract calls are made To record and View the patient data.
- AccessControl - This is used to limit the users from accessing data. As medical records can be misused, This Access Control helps access the records either by the doctor or Patient only.
- GetMedicalInfoAddGet - This contract is used to make call to multiple other contracts functions to fetch and add the information form and to the blockchain. Function GetMedicalInfoDoctor, which calls the contract Doctor and Furthermore the functions which fetches the information only. Function AddMedicalInfoDoctor, will send the data to the contract Doctor and Furthermore the functions which adds the information only.
- Doctor - Contains the implementation of the Doctor Information.
- Patient - Contains the implementaiton of the Patient Information
- Records - Contains the implementation of the Record keeping of the patient.
ABI's are json files which helps in interaction with the blockchain through Normal Web.
There are 2 ways to become a Doctor.
- Contact Owner
- Contact Doctor who is already authorised in Re-Chain Admin Pannel can be accessed by clicking here
Pass the wallet addreess of the user who is going to be the user and you are all set.
Note You cannot Un-authorise a user until and unless you are the owner.
:) Available to donate blood? (Yes/No) -> try using indexed keyword to search through
:) Willing to Donate Organs in case of Unfortunate demise? (Yes/No)
For this Yes/No -> Create seperate pages like, search for Blood Donors, Here, only address along with their blood group will be shown and rest information can be only viewed by doctor.
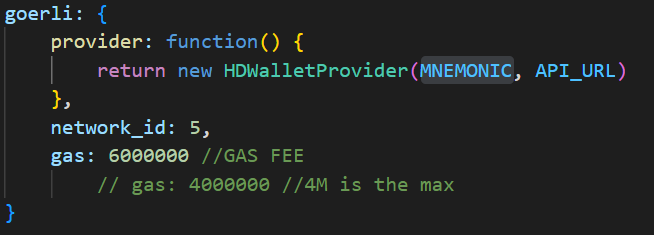
Current Active Deployment is done on Goerli Network.
Local Deployment is on Localhost.

truffle networks --clean : removes all the deployments
truffle migrate --reset --network <goerli - N/W Name>: Resets the contract deployment i.e starts from 0 and deploys it on goerli net.
truffle console --network goerli: opens goerli console.
Contains the Memonic and the address of the testnet. Format of same is:
API_URL = "https://eth-goerli.alchemyapi.io/v2/API_KEY"

MNEMONIC = "privatekey here"

To re-deploy, you will first need to install the requirements. You should have Node installed
npm install
- truffle compile
- truffle migrate --reset
- truffle console
- Now you will be in console window and you can run commands. See the below section on how to run commands in local deployment.
- truffle compile
- truffle migrate --reset --network goerli (here i am using goerli testnet)
- truffle console --network goerli (to enter into the goerli testnet console)
- Run the commands just like you ran commands in Local deployment.
First, you have to create a instance of the deployment using get = await Patients.deployed()
Now, you can access the Patients contract with the 'get' only. So all the functions can be accessed like this
get.addPatientName('Name')get.getPatientName('ID')
Similarly, you can do it for other contracts, and call the functions with instanceName.functionName('parameter')
Access Needs to be given for that you can simply goto GetMedicalInfoAddGet & authorise.
get = await GetMedicalInfoAddGet.deployed(): This will create the instance of GetMedicalInfoAddGet contract.
get.addAuthorisedDoctor('address'): This will authorise the user whose address has been passed in the parameter as Doctor.
- Doctor can add Patients
- Doctor can add Dcotors
- Doctor can add/view reports
- Doctor can view other Doctor
Created By Neeraj