You signed in with another tab or window. Reload to refresh your session.You signed out in another tab or window. Reload to refresh your session.You switched accounts on another tab or window. Reload to refresh your session.Dismiss alert
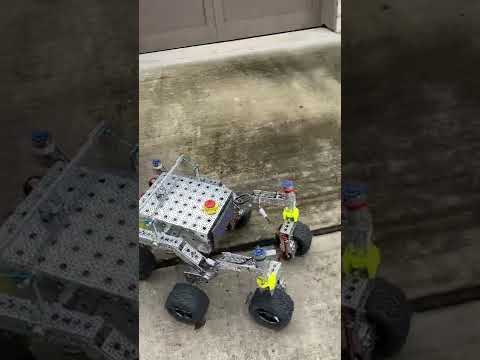
This is my second rover! I built the first one Robert the Rover in 2019. This version is the original v2 of the OSR, which I lead the mechanical design of.
I built a roof rack for it so that it could carry stuff around. As you can see from my first rover's mods, I switched to a roof payload holder instead of a trailer cart since that makes doing autonomy easier and lowers the chance of slipping.
JPL Rover
:-:
Expand to learn more about this build!
Constructed in 2017, upgraded many times since!
JPL has used this rover for many different events, from JPL/Mars outreach events, taking it to schools, local robotics clubs, and even a few robotic conferences!
Maintained by a few different JPL employees over the years
modifications
Annodization! Before assembly of this version we got the metal pieces annodized a mix of red/black
Micro D-Sub connectors at each of the rocker-bogies, so that both can be taken off easily and rover can be transported much easier!
I started construction in December 2019. Robert took his first steps about 3 months later.
I use the rover for fun,
I help maintain the two repositories. I'm a robotics engineer by training and happy to help with anyone stuck or with ideas. The best way to reach me is via Slack.
RC: For outdoor roving, I use a long-range transmitter and receiver from Spektrum.
sensor stack: I mounted a lidar on top of my rover to allow for 2D mapping, localization, and navigation. I also have mounted (variations of) two monocular cameras, an IMU, and depth cameras to it. Details in my blog post.
toy trailer: I bought this toy trailer so that Robert can carry a payload. I attached it to Robert using a repurposed wrench and a collar clamp. It's not very robust but it does the trick!
handle: I used a strong piece of rope and a small piece of PCV tubing (handle) to lift the rover off the ground so I could carry it up and down stairs.
Astronomy days at the North Carolina Museum of Natural Sciences Three times. One time Roverto had the opportunity to try and drive over a full size Curiosity wheel. The last time we rand that event, there were over 14,000 attendees.
We'll be needing a little bit of git skills here. Although not strictly necessary, it helps to take a look at some tutorials on contributing using git & GitHub. Here are the basic steps.
install git on your computer. On Linux, that means sudo apt-get install git
Fork this repository by clicking the Fork button in the top right corner of the GitHub page.
'Clone' your fork to your computer by clicking the green Code button and copying the link. Type in git clone into your terminal and paste the link you just copied.
Create a new branch and switch to it. git checkout -b ourrovername_gallery
You're ready to start making changes! You can use any text editor of your liking, like VS code.
copy over someone else's section and adjust it to include your build's information. Add your entry to the bottom, just above this section. To keep this compact, add any text and details to the collapsible section (within the <details> </details> tags).
Create a new folder within the images folder and add your rover's pictures to it.
Change the image links to point to your images. The format for that is image src="images/your_folder_name/your_picture.jpg".
Commit your changes with git.
in the terminal, navigate to this folder. git status should show that there are changes and new files.
use git add folder_name/file_name for each change you want to include to stage those files.
Commit these changes: git commit -m "Adding my rover to the OSR gallery!"
Upload them using git push origin ourrovername_gallery, replacing ourrovername_gallery with the branch name you created earlier.
Create a Pull Request (PR) to suggest merging your code into the main branch.
Navigate to the repository's pull request page on GitHub. Click 'New pull request'.
click 'compare across forks'.
Select your fork from the head repository dropdown and pick your branch.
click 'create pull request'. GitHub will take you to a page where you can create a title of your suggested changes and a description.
Wait for a maintainer to review your changes. They might ask you to make changes if something doesn't look right. Once the PR has been greenlighted, your changes will be added to the main branch!